May 29, 2014

Making the Look: Steven Alan

Making the Look: Steven Alan


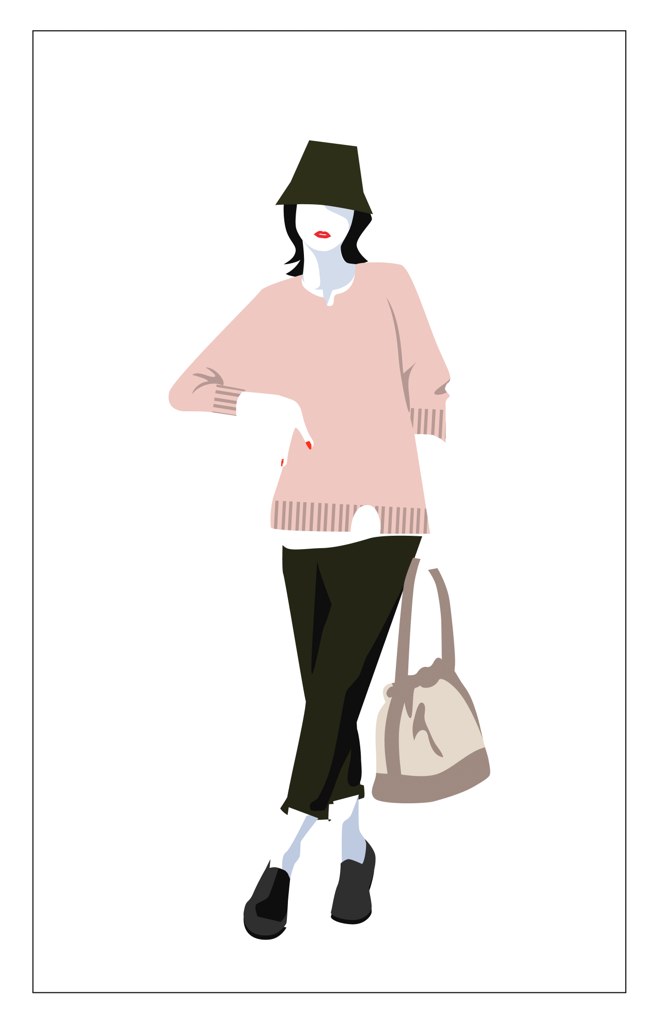
        Sometimes when flipping through a lookbook you might find that one perfect outfit. Might not be really beautiful or extraordinary in any way, but it's you. It's your style. Not the style you wish you had but the one you actually have. An outfit that could fit you and your life effortlessly.
        The Steven Alan spring summer 2011 look is such a style for me. When I think of all the festivals coming up this summer and the place I live in, with it's sometimes chilly nights, I know I would wear this kind of outfit a lot.
        When I saw the lookbook for the first time I knew nothing about sewing or dressmaking ... but now that I've got "my feet wet" I decided to make it from A to Z (hopefully the hat and bag too). Actually I changed a bit the colours and added the hat (same collection - different outfit, but I like it).

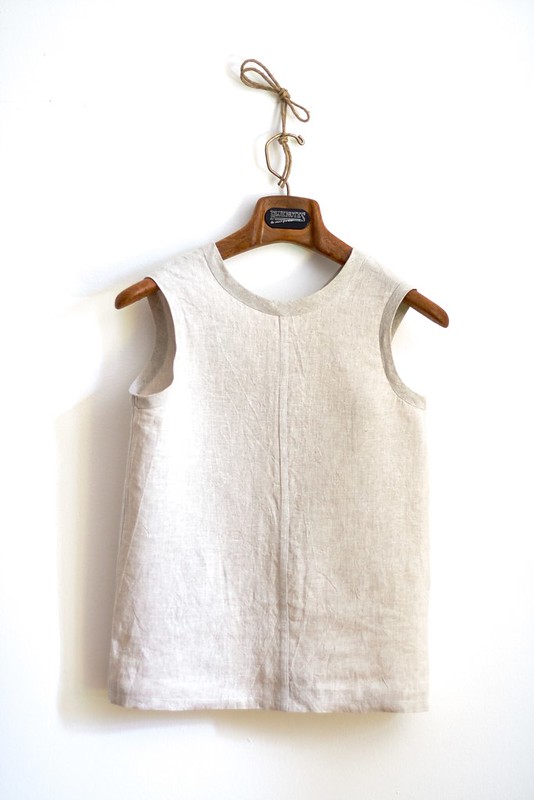
        The blouse: a Carme Blouse by Pauline Alice variation. I've been meaning to try the Carme for sometimes now - it's such a beautiful pattern and all around are popping up so many amazing instances.

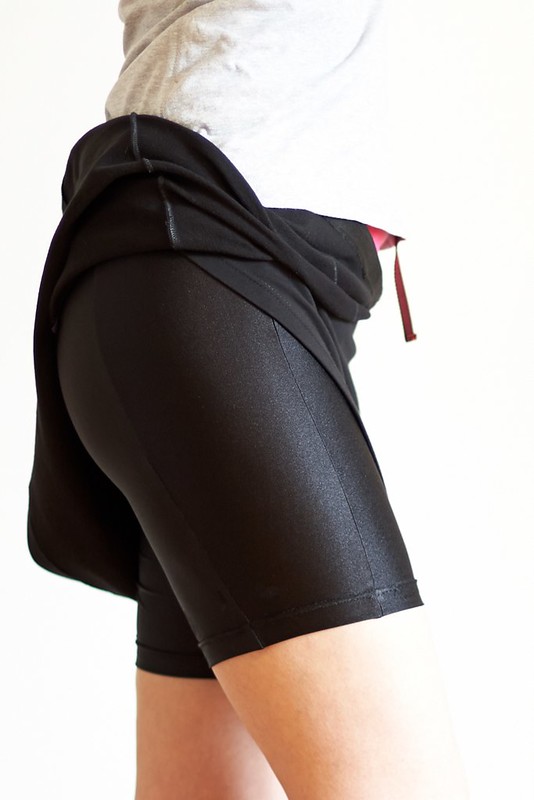
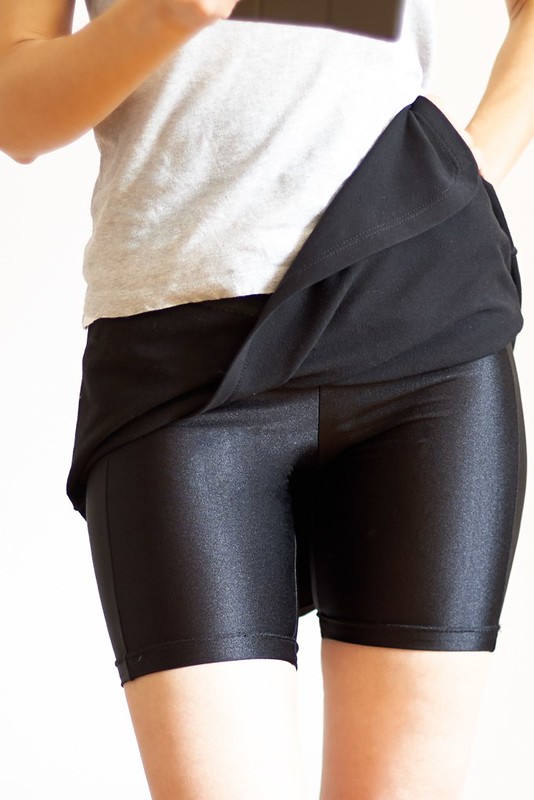
        The pants: I'm undecided between the Thurlow Trousers from Sewaholic modified towards a more skinny line, and the Jacques from Republique du Chiffon ..

        The pullover: knitting such a simple garment from an existing pattern is no longer a challenge for me so I'll make my own pattern: a seamless one.

        The hat and the bag: never made hats or bags before so I'm going to have a blast learning how to :-). If you know some good resources - I'm reeeeeally open to suggestions.

        I have to find fabrics, study patterns, make muslins.... I think this project will keep me busy for a while! In the meantime I got started on the pullover - knitting takes longer after all!


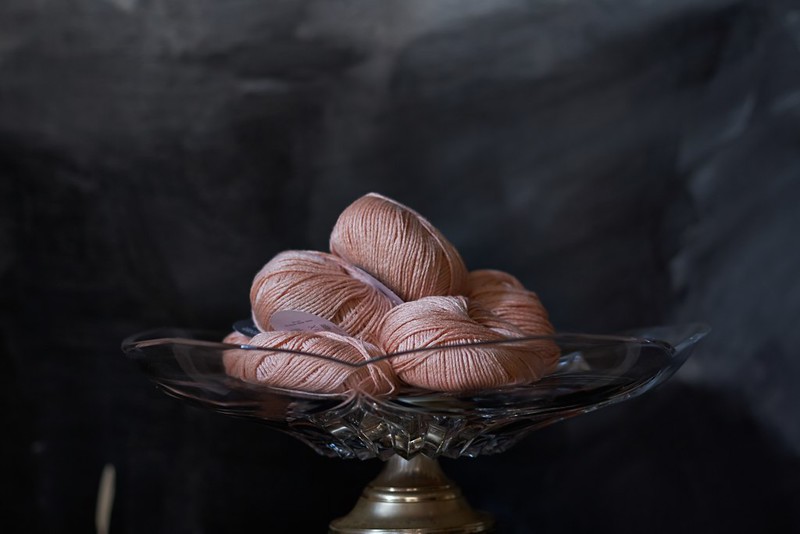
        The yarn is Pepe made in Italy by Filatura di Crosa and it's a beautiful blend of linen and viscose. Unfortunately they discontinued the production and I found the last of it in a shop in Udine.


        The color is the number 5 on the color chart - a sort of antique pink, I have no idea what Filatura di Crosa called it originally. I've swatched it in stockinette and got a gauge of 21 stitches and 27 rows for a 10x10cm sample using 4mm needles.


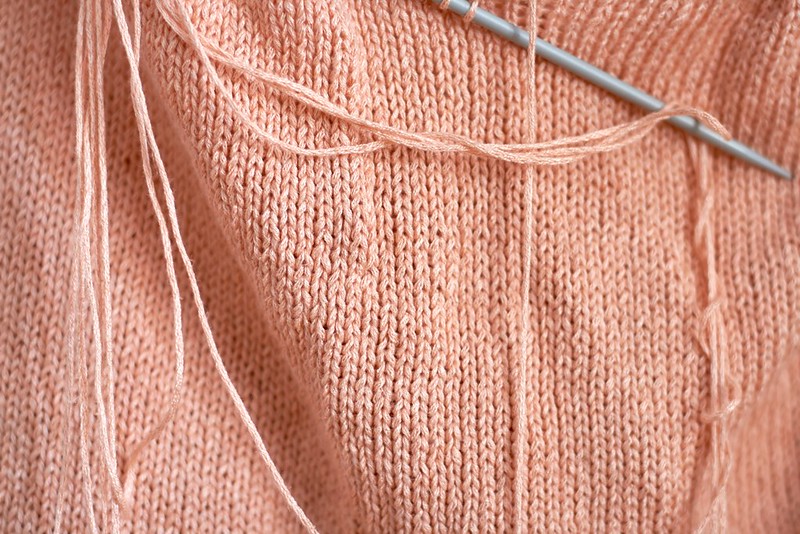
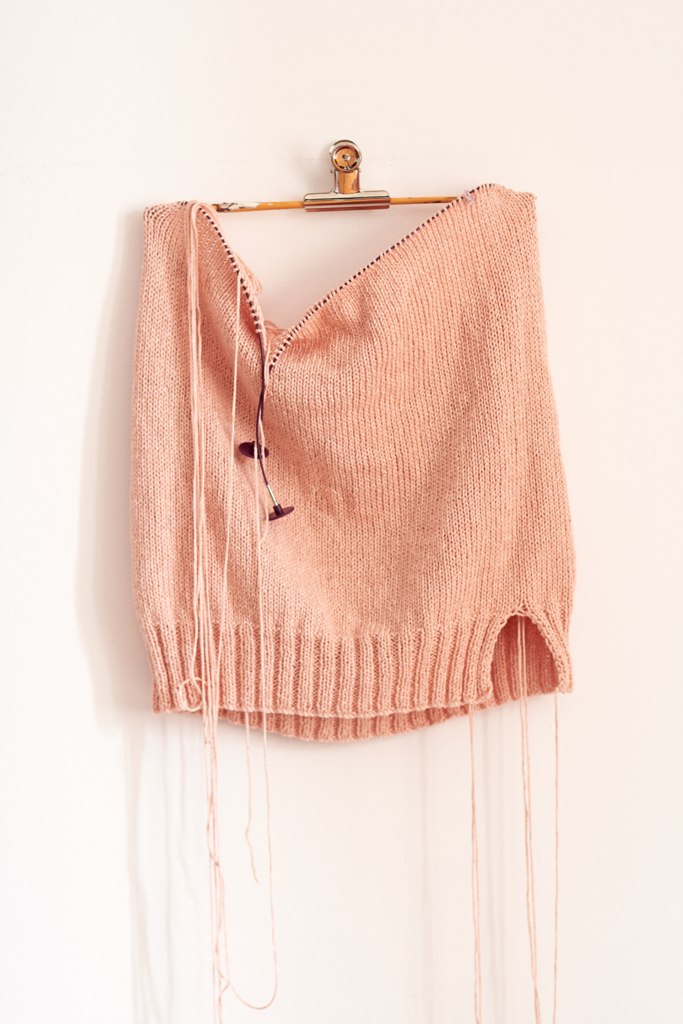
        I cast on 188 stitches and worked a 2x2 ribbing for 24 rows and joined on circular needles. The bodice to the underarm is done. Now I have to start on the sleeves while figuring out the math.


Thank you for visiting. I would love to hear your opinion.

Il Look Fai da Te: Steven Alan


        A volte sfogliando un lookbook capita di trovare un "outfit" perfetto. Potrebbe magari non essere chissà quanto bello o in qualche modo straordinario ma ti piace. É il tuo stile. Non lo stile che vorresti avere ma lo stile che in effetti hai. Un "outfit" che ti andrebbe bene senza nessuna forzatura.
        Per me, il look primavera estate 2011 di Steven Alan ne è un esempio. Quando l'ho visto la prima volta non sapevo niente di cucito o sartoria ma adesso che sto imparando ho deciso di realizzarlo dalla A alla Z (con un po' di fortuna anche il cappello e la borsa). In verità ho cambiato i colori e aggiunto il cappello (stessa collezione, diverso outfit).

        La blusa: una variazione della Blusa Carme di Pauline Alice. È un po' che ci sto pensando di provare la Carme. È un cartamodello bellissimo e sulla blogosfera sono comparse tantissime meravigliose declinazioni.

        I pantaloni: sono indecisa tra i Thurlow di Sewaholic modificati verso una linea più asciutta ed i Jacques di Republique du Chiffon...

        Il maglioncino: realizzare a maglia un cosa così semplice da uno schema già esistente non rappresenta più una sfida per me perciò ho deciso di farmi da sola lo schema e in più farlo senza cuciture.

        Il cappellino e la borsa: no mai fatto cappelli o borse prima perciò mi divertirò un mondo a imparare. Se conoscete qualche buona guida, libro, ecc. sono veeeeeeramente aperta a suggerimenti.

        Adesso devo trovare tessuti, studiare cartamodelli, fare tele di prova…… Penso che questo progetto mi terrà impegnata per un bel po' . Nel frattempo ho cominciato il maglioncino... ci vuole più tempo a lavorare la maglia dopotutto.


        Il filato è Pepe prodotto dalla Filatura di Crossa ed è un bellissimo misto lino viscosa. Sfortunatamente non lo producono più e ho trovato gli ultimi pezzi in un negozio a Udine. Il colore è il numero cinque della cartella colori - una sorta di rosa antico.


        Ho lavorato con ferri da 4mm un campione in maglia rasata di 10 × 10 cm e ho ottenuto 21 maglie per 10 ferri.


        Ho montato 188 maglie e lavorato a coste di 2 × 2 per 24 ferri dopodiché ho unito su ferri circolari. Il corpetto fino sottobraccio è finito. Adesso devo cominciare le maniche e nel frattempo pensare a tutti i calcoli da fare.


Grazie della visita. Mi piacerebbe moltissimo sentire la vostra opinione.

May 22, 2014

Running Franken-Skort

Running Franken-Skort


        While everybody seems to be making bodysuits, that is Closet Case Files’ Netties - with remarkable results, if I may say so - as Mokosha’s, Sara’s, and the ones made by the ladies behind Jolies bobines and Sown Brooklyn; just to name a few… I decided to take one (bodysuit) apart. It was a gift, it was long-sleeved, it was too big, it was toooooo shiny. Besides me and bodysuits don’t get along and it goes both ways: I don’t look good in them, they don’t look good on me. I have no need for a bodysuit but I do need a running skort (the lovechild of a skirt with a pair of shorts). I dislike shorts, they make me feel like running in my knickers and the crops leave a nasty mid calf tan line in the summer.
        A skort it is.

        Armed with scissors I started hacking at the bodysuit - sorry no photos, it was 2am and flash photography is not my thing (….unless we’re talking conceptual stuff).
        For the shorts/leggings part I settled on the Burda Lace Leggings pattern. I dropped the waist a lot, cut the leg to the length and had to cut away a 10 cm strip in the middle of the pattern (it’s a one piece pattern), because it wouldn’t fit on the bodysuit bodice and had to use the fabric from the sleeves to add width. From a pair of leggings without a side seam I now had one with two side seams. To use the whole thing to my advantage I decided to shape anatomically the panels to be inserted at the sides.


leggings side pannel


        By the way the fabric is a technical, moisture wicking and breathable nylon - polyester blend.


skort


        For the skirt part I chose the Burda Hip Wrap pattern - used the bottom skirt, lengthened it and rounded the corners as in the top one. I cut it in the left-over fabric from my Jersey Trousers.


        The two edges at the front needed in-seam stabilising because it’s stretchy knit cut on bias.


diy running skirt


        Made a small (smartphone size) zipper pocket on the top back of the skirt (between the skirt and the leggings).


skirt zipper pocket

skirt smartphone poket

skort


        Attached a jersey ribbing belt (excess fabric from the Lil Monkey Tunic Top) with sown in elastic on the inside and a drawstring cord. I chose the drawstring cord based on color but I think I’m going to change it, it’s too bulky.


burda hip wrap skirt

burda hip wrap


        I’m so pleased with it that I think I’m going to sew more sportsware. When I manage to find another piece of high performance technical fabric (any ideas?) I’ll make a pair of yoga crops… or two.
        Time to get moving!


running skirt

running skort

running


Thank you for visiting. I would love to hear your opinion.

Franken-Gonna da Corsa


        Mentre tra le blogger di cucito sartoriale impazza il body, cioè il Nettie da Closet Case Files - con risultati notevoli, come quelli di Mokosha, di Sara, oppure delle signore dietro Jolies bobines e Sown Brooklyn; solo per fare alcuni esempi… io ho deciso di farne a pezzi uno (body). Era stato un regalo, a maniche-lunghe, troppo grande, trooooppo lucido. Inoltre io ed i body non andiamo molto d’accordo e la cosa è anche reciproca: loro non mi stanno bene ed io non ci sto bene dentro. Non ho nessun bisogno di un body, quello che mi serve e una gonna da corsa cioè una skort (gonna + pantaloncini/leggings corti). Non mi piace molto indossare pantaloncini corti, mi sembrano più una cosa da indossare in spiaggia, non per andare a correre su strada, ed i crops - i leggings 3/4 lasciano durante l’estate degli alquanto spiacevoli segni dell’abbronzatura sui polpacci.
        Vai per la gonna da corsa.

        Armata di forbici ho cominciato a fare a pezzi il body - spiacente niente foto, erano le due di notte e la fotografia con flash e una cosa che non mi attira per niente (… ad eccezione scelte concettuali).
        Per la parte dei leggings sotto ho optato per il cartamodello Burda Lace Leggings. Ho abbassato la vita, accorciato la gamba ed in più ho dovuto tagliare una striscia di 10cm dal mezzo (il cartamodello è a pezzo unico) perché non ci stava nel tessuto recuperato dal corpetto del body. Ho dovuto usare il tessuto delle maniche per arrivare alla larghezza necessaria. Invece di avere un paio di leggings senza cucitura laterale mi sono così ritrovata con un paio di leggings con due cuciture laterali. Per sfruttare al meglio la situazione ho deciso di dare una forma anatomica al inserto in mezzo.


panello laterale leggings


        A proposito il tessuto è un misto nylon- poliestere tecnico, traspirante, anti-umidità.


skort


        Per la gonna ho scelto il cartamodello Burda Hip Wrap - del quale ne ho usato il modello per la parte sotto che ho allungato ed arrotondato gli angoli come in quello sopra. L’ho tagliata nel tessuto che mi era avanzato dai Pantaloni in Jersey.


        Ho dovuto stabilizzare i due bordi davanti perché non solo il tessuto è stretch ma sono anche tagliati in sbieco.


gonna da corsa fai-da-te


        Ho fatto una piccola tasca (dimensione smartphone), con chiusura lampo, sul retro in alto tra la gonna ed i leggings.


sgonna con tasca

tasca per smartphone

skort


        Ho aggiunto una cintura in jersey a coste (tessuto rimasto dal Vestitino Piccola Scimmietta) con del elastico cucito all’interno e cordoncino da tirare. Ho scelto il cordoncino perché mi piaceva il colore ma penso di cambiarlo visto che è un po troppo spesso.


burda hip wrap skirt

burda hip wrap


        Sono così contenta di come è venuta che sto pensando di provare a fare altri pezzi di abbigliamento sportivo. Appena riuscirò a rimediare un altro po di tessuto tecnico (qualche idea?) sto pensando di fare un paio … o due… di crops da yoga.
        Tempo di muoversi!


running skirt

running skort

running


Grazie della visita. Mi piacerebbe moltissimo sentire la vostra opinione.

May 14, 2014

Adventures in Dartless (2) - Linen

Adventures in Dartless (2) - Linen


        The main problem with the dartless bodice basic block, as outlined in Il Modellismo Sartoriale is that it “…causes the front of the armhole to gape. The amount of the gape depends on the depth of the bust”.        
        In my previous project based on this block, trying to remedy I ended up overfitting slightly. This time I thought to follow the advice given in the book : “apply to the armhole edge a bias strip which is slightly shorter than the measurement of the entire armhole”. I redrafted the whole thing keeping a reasonable ease at the bust and made some style changes to go with the bias binding. I learned how to make my own bias binding, I wanted it in the same fabric and made it wider than the standard ones - a choice dictated by aesthetics which made a bit more difficult the sewing it on part. I had to really stretch the edge at the seam to compensate for the extra width. Between the stretch to compensate for this and stretch to compensate for that, the whole thing started to be quite complicated and to simplify I decided to use a version of the method used for setting in sleeves. After stay stitching the front neckline and the armholes I made a couple of rows of ease stitches going from the middle of the front armhole to the underarm and using these rows I “eased” the armhole into the bias binding.
        To my surprise it kinda worked.


        As in Italy summers can be quite hot I like a lot to wear linen. I have several meters of 30cm wide strips of raw linen (long story…) and to be able to use it I’ll have to get creative. In this case I decided to join two pieces together using a flat-felled seam.


Dartless Bodice Back

Dartless Bodice Back


        In case you might wonder I do own a pressing iron… the pieces of linen I used were “ruined” by some thermal machine process and the creases cannot be eliminated - but then that’s what I liked about it.


Simple Linen Top

Dartless Linen Top


        It is light and comfortable and casual … and I am pretty pleased with it.


Linen Top


        For now, no download for this … I want to fiddle with it some more and try and learn to grade it - I’m thinking from a size 40 to a 48 but will see :-).


Thank you for visiting. I would love to hear your opinion.

Avventure Senza Riprese (2) - Lino


        Il problema più grande del corpetto semplice senza riprese, così come schematizzato nel libro Il Modellismo Sartoriale è che “…nella posizione dell’incavo davanti, provoca un molleggio del tessuto a causa della sporgenza seno”.
        Nel mio precedente progetto basato su questo tipo di corpetto, nel provare a ovviare a tale difetto sono finita col farlo un po troppo aderente attorno al busto. Questa volta ho pensato di seguire il consiglio nel libro: “applicare un bindello teso nella parte del molleggio dell’incavo davanti”. Ho ridisegnato il tutto, tenendomi ragionevolmente larga attorno al busto e ho fatto qualche cambiamento di stile per farci andare il nastro sbieco. Ho imparato come fare il nastro sbieco - lo volevo nello stesso tessuto e un po più largo rispetto alle misure standard - una scelta dettata dall’estetica che però ha complicato molto la parte del montaggio. Ho dovuto tirare più del normale il bordo di cucitura per compensare la larghezza del nastro. Tira di qua, tira di la, le cose cominciavano a diventare macchinose e per semplificare ho pensato di usare una versione del metodo normalmente impiegato per il montaggio delle maniche. Dopo aver fatto una riga di cucitura attorno ai bordi del collo e delle maniche per stabilizzare le curve, ho eseguito due filze parallele dalla metà dell’incavo davanti fino all’ascella, ridotto e cucito il nastro sbieco.
        Sorprendentemente sembra funzionare.


        Adoro il lino, lo trovo molto adatto per il caldo estivo. Ho alcuni metri di lino grezzo a strisce 30cm larghe (lunga storia…) e per poterlo usare dovrò diventare creativa. In questo caso ho usato una cucitura ribattuta per unire due pezzi insieme.


Corpetto Senza Riprese Dietro

Corpetto Senza Riprese Dietro


        Se per caso vi state chiedendo, ho un ferro da stiro e lo so anche usare… i pezzi di lino che ho tagliato sono stati “rovinati” attraverso qualche procedimento termico a macchina e le increspature no possono essere eliminate - per dire il vero mi piacciono, sono il motivo per il quale li ho scelti.


Canotta Semplice in Lino

Canotta in Lino


        E’ leggero, confortevole e casual … e sono piuttosto contenta di come è venuto


Canotta in Lino


        Per adesso nessun download … voglio fare ancora delle piccole modifiche al cartamodello e poi provare ad imparare a progettarlo in altre taglie - forse da 40 a 48 … vedrò :-).


Grazie della visita. Mi piacerebbe moltissimo sentire la vostra opinione.

Google+